If you’ve spent any amount of time hauling cargo across Death Stranding 2’s fractured, chiral-matter soaked landscape, you’ve almost certainly run into Death Stranding 2 watchers when you least expect it. I’ve lost count of how many perfect S-rank deliveries I almost threw away because one of these creatures popped out of nowhere when I was focused on navigating a steep mountain path. Unlike the more predictable BTs from the first game, these new enemies have a whole suite of tricks to catch players off guard, and even small mistakes can lead to damaged cargo or a full voidout if you’re not careful. This guide breaks down everything you need to know to handle them, no matter what type of delivery you’re running.
What Makes Death Stranding 2 Watchers Different From Original BTs?
If you played the first Death Stranding, you’re probably used to BTs sticking to timefall zones and triggering your Odradek scanner long before they get close enough to spot you. Watchers throw all those rules out the window, and that’s where most new players get tripped up. First, they don’t trigger the usual BT detector hum until they’re within 50 meters, which barely gives you enough time to react if you’re moving at full speed on a bike. They also don’t just stick to rainy areas – they can spawn in clear, sunny zones if you’re carrying high-value premium cargo or have a large amount of unused chiral matter in your inventory.
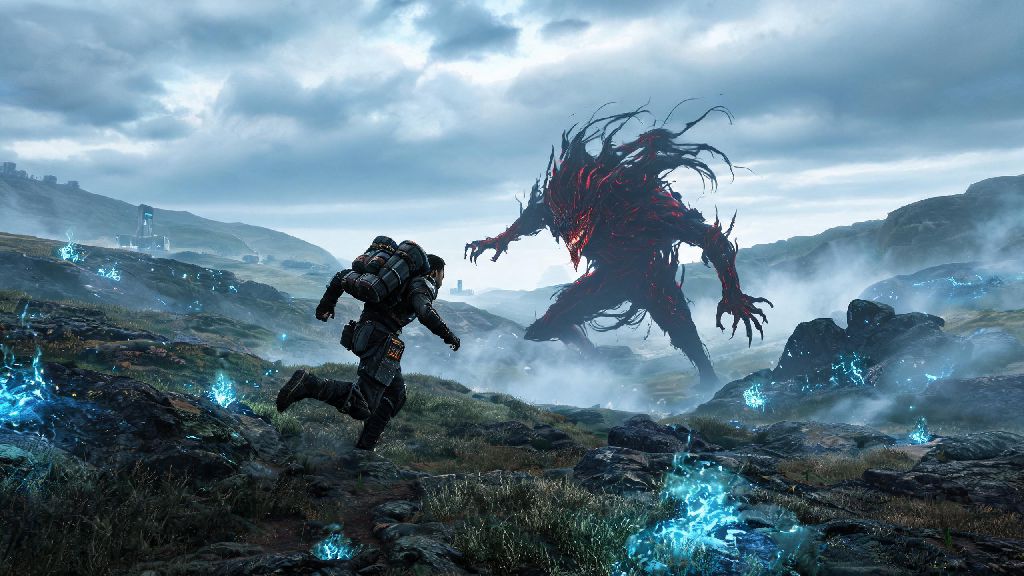
Visually, they’re easy to tell apart from standard BTs too. They stand almost 10 feet tall, with long, lanky limbs and multiple glowing red eyes scattered across their chest and head instead of the single white core most BTs have. Watchers can call in 2-3 smaller hunter BTs in 10 seconds if they spot you, so even if you can handle one enemy, a small mistake can quickly turn into a horde fight you can’t escape. They also don’t vanish after timefall stops like old BTs do – once they spawn in an area, they’ll stick around for 2-3 in-game days unless you take them down or move far enough away to reset the zone.
How to Spot Watchers Before They Notice You
The best way to deal with watchers is to avoid them entirely, and that starts with spotting them before they pick up your trail. There are a few small, easy-to-miss warning signs that a watcher is nearby, even if your scanner isn’t going off yet. First, if your cargo starts to glow a faint blue even when there’s no rain, that means there’s active chiral matter in the area, and a watcher is likely within 300 meters. Second, if you see small patches of glowing white chiral grass growing in areas you’ve previously traveled through and cleared, that’s a marker a watcher has passed through recently and is probably still nearby.
After getting caught off guard dozens of times, I’ve built three simple habits that cut my unexpected watcher encounters by 70%:
- Do a full 360-degree visual scan every time you cross a ridge or enter a new valley, especially if you’re carrying premium delivery cargo that can’t be damaged
- Keep your masking device charged to at least 70% whenever you leave a distribution center, even if the weather forecast says no timefall is expected
- Use the chiral camera to scan areas ahead for heat signatures if you’re traveling after dark, when watchers are most active and hardest to see with the naked eye
You don’t have to spend five minutes scanning every step of your route, but taking 10 seconds to check your surroundings when you enter a new area will save you a ton of frustration. I used to skip these scans when I was rushing to hit a tight delivery deadline, and I got dragged into three separate giant BT boss fights in one play session because I missed watchers hiding in tree lines. It’s never worth cutting corners on this step.
Strategies to Avoid or Fight Watchers Depending on Your Cargo
How you handle a watcher encounter depends entirely on what you’re carrying, and there’s no one-size-fits-all approach that works for every situation. If you’re hauling fragile, time-sensitive, or high-value cargo, your first priority is to sneak past, not fight. Crouch, move slowly against the wind so your scent doesn’t carry towards them, and don’t use any vehicles – engine noise will attract their attention instantly, even if you’re 200 meters away. If they do spot you, throw a smoke grenade and run perpendicular to their line of sight, not straight away. They’re programmed to track linear movement first, so moving side to side will throw them off long enough for you to escape to a safe zone.
If you’re carrying standard cargo that can take a few hits, or you’re on a bounty mission to clear BTs from a route, fighting a watcher is totally doable as long as you have the right gear. Start with hematic grenades to stun them for 3-4 seconds, then switch to the anti-BT rifle to target the red glowing eyes on their chest. Each watcher has 4 weak point eyes, and hitting all of them will take them down in 6 shots or less, even if you’re using the base-level anti-BT rifle you unlock early in the game. Keep at least 30 meters of distance between you and the watcher when you deliver the final blow, because if it dies too close to you, it can trigger a small voidout that will damage all your cargo and knock you unconscious for 10 in-game minutes.
There’s no huge reward for taking down watchers, but clearing one from an area will keep that zone free of BTs for 2-3 in-game days, which is really helpful if you have multiple deliveries planned through the same route. I always clear watchers from the mountain path between the Mountain Knot City and the Timefall Farm early in my playthroughs, because it cuts down on delays for all the agricultural supply runs I have to do later on.
Common Mistakes Players Make With Watchers
Even veteran players from the first Death Stranding make a lot of avoidable mistakes when they first run into watchers, because they assume these enemies work the same way old BTs do. The most common mistake I see is players thinking they can outrun a watcher on a reverse trike or truck. Watchers can move just as fast as a trike on rough terrain, and they’ll knock you off your vehicle instantly if they catch up, leaving your cargo scattered all over the ground. If you spot a watcher while you’re driving, stop immediately, turn off your engine, and get out to sneak past instead of trying to speed through.
Another big mistake is using regular guns or melee weapons on watchers. Regular bullets do almost no damage, and hitting a watcher with non-hematic weapons just makes it angrier, so it will call in backup twice as fast as it would otherwise. Save your regular ammo for human enemies, and only use anti-BT gear on watchers. A lot of players also think hiding on top of small rocks or low ledges will keep them safe, but watchers can climb up to 10 meters high, so you need to get on top of a player-built structure or a tall cliff to be completely out of their reach.
One of the costliest mistakes you can make is ignoring the watcher’s screech warning. When they first spot you, they’ll make a high-pitched, sharp screech, and you have exactly 5 seconds to break their line of sight before they call in hunter BTs. If you hear that noise, don’t hesitate – throw a smoke grenade, dive behind a rock, or activate your masking device right away, even if you think you’re far enough away to escape. Waiting even a second too long will lead to a fight you probably don’t want to be in.
At the end of the day, Death Stranding 2 watchers aren’t impossible to deal with, they just require a little more planning and attention than the BTs you might be used to. You don’t have to carry a full load of anti-BT gear on every delivery, but keeping a couple hematic grenades and a charged masking device on you will get you out of almost any unexpected encounter. Even after 60 hours of play, I still get caught off guard sometimes, but following the tips in this guide has cut my watcher-related delivery failures by 80% at least. Remember, keeping your cargo intact is always the main goal, so don’t be afraid to run away if you’re not prepared to fight.