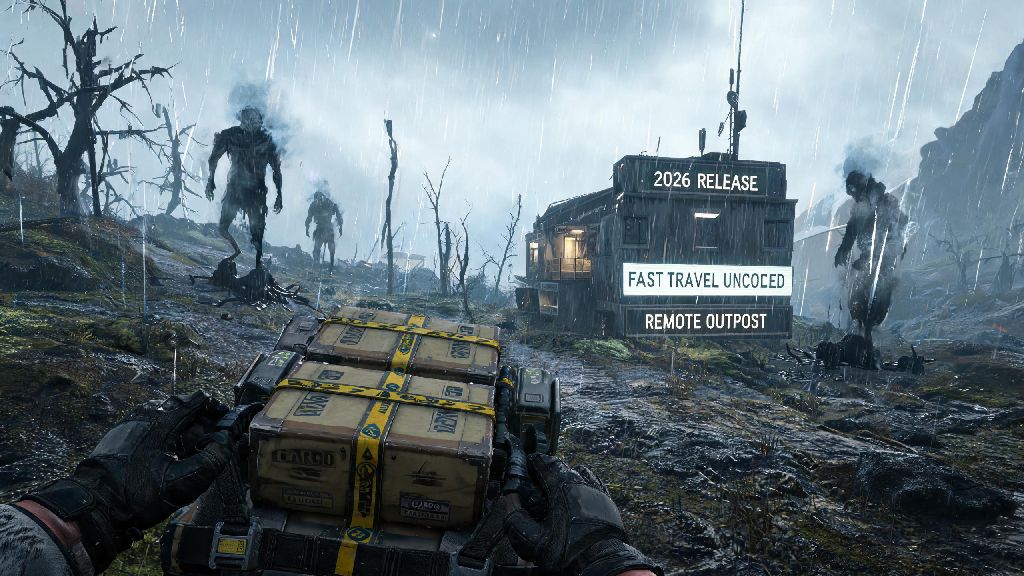
If you’ve spent any time exploring the post-apocalyptic United Cities of America in the first Death Stranding, you already know that BTs are one of the deadliest threats you can face out in the void. But catchers in Death Stranding 2 are a whole new level of dangerous, with updated abilities, new variants, and ties to the game’s evolving story about chiral networks and the line between life and death. Most new players run into their first catcher within the first three hours of gameplay, and if you don’t know what you’re doing, you can end up triggering a voidout that wipes out entire outposts you spent hours delivering supplies to. This guide breaks down everything you need to know to spot, avoid, and if necessary, take down these terrifying entities without losing your cargo or your progress.
What Makes Catchers in Death Stranding 2 Different From the Original Game
If you played the first Death Stranding, you probably remember catchers as the massive, tar-covered BTs that only spawned if you got caught by a swarm of smaller BTs and failed to escape. That’s no longer the case in the sequel, and that shift is one of the biggest gameplay changes returning players will notice first. Unlike the first game’s catchers, DS2 variants don’t only appear when you trigger a BT hunt – some roam specific high-chiral zones even if you’re completely hidden and haven’t made a sound.
They also have far more varied attack patterns than their original counterparts. The first game’s catchers mostly just swiped at you and tried to drag you into the tar to trigger a voidout. DS2 catchers can grab cargo right off your back, launch tar projectiles from a distance, and even summon small BT swarms to corner you if you try to run. Their weak points are no longer limited to the glowing golden umbilical cord on their chest either, so you’ll have more targets to aim for if you choose to fight them.
Some catchers are also tied directly to character story beats, especially those centered on characters who lost their lives in the first game’s voidout events. You won’t run into these variants during random open-world exploration, but they show up during key main missions and often drop rare crafting materials or unlock new delivery routes once defeated.
Key Catcher Variants You’ll Encounter in the Wasteland
Not all catchers work the same way, and learning to spot each variant before it spots you will save you a lot of frustration. There are three core variants currently confirmed in the game, each with unique behavior and risks:
- Standard Tar Catcher: The most common variant, similar to the original game’s catchers, made of thick tar and ranging from 10 to 20 feet tall. They rely on sound to track you, and will only attack if you make noise or stand in their direct line of sight for more than three seconds. They can grab cargo right off your back from 15 feet away, so don’t get close unless you’re prepared to fight.
- Chiral Ghost Catcher: A new, semi-transparent variant that only appears during chiral storms. They don’t make the usual BT warbling noise, so you can’t rely on your odradek to pick them up until they’re within 10 feet of you. They can phase through obstacles, so hiding behind rocks or delivery trucks won’t keep you safe if they’ve locked onto your position.
- Story-Bound Named Catcher: Rare variants tied to specific main story missions, often linked to characters who died during the first game’s voidouts. They have unique attack patterns, like launching tar projectiles or summoning small BTs to swarm you, and defeating them usually unlocks permanent access to new delivery routes or rare crafting materials.
I’ve run into two Ghost Catchers during unexpected chiral storms while running cross-country deliveries for the new coastal network, and I can confirm they’re far more annoying than the standard variant. The first time I encountered one, I didn’t even notice it was there until it knocked half my medical supply cargo into a tar pit. You’ll want to keep a couple of extra hematic grenades on you any time you’re heading into a zone with frequent storm warnings.
Practical Tips for Avoiding or Defeating Catchers
The best way to handle any catcher is to avoid it entirely, since fighting uses up valuable hematic supplies you might need for later missions. If you spot a catcher before it spots you, hold your breath, crouch, and move slowly around the edge of its patrol zone. Your odradek will beep faster the closer you get to its detection range, so pay close attention to the alerts. If you’re in a group with other players in multiplayer mode, make sure everyone is on the same page about avoiding detection – one person running or making noise can trigger an attack for the whole group.
If you do get spotted, don’t panic and run right away. Toss a chiral smoke grenade first to break its line of sight, then move slowly away from the area until your odradek stops beeping. Running will only make it follow you further, and can draw more BTs to your location. If you’re carrying light cargo, you can also use a floating carrier to glide down a steep hill to escape, since most catchers can’t move fast enough to keep up with you on steep terrain.
If you have no choice but to fight, aim for the glowing golden weak points scattered across its body – usually on its limbs and chest. You don’t have to kill a catcher to escape – dealing enough damage to stun it for 30 seconds is usually enough to get away with your cargo intact. Upgraded hematic rifles deal 3x more damage than standard hematic grenades, so if you plan on fighting catchers regularly, it’s worth unlocking the rifle blueprint as early as possible. If you’re in a zone with connected chiral network coverage, you might also find player-placed chiral cannons that can take down even named catchers in just a couple of shots.
Common Catcher Mistakes New Players Make (And How to Fix Them)
One of the most common mistakes new players make is using regular firearms or melee weapons on catchers. These weapons deal zero damage to BT entities of any kind, and wasting ammo on them will just leave you defenseless against human MULEs later. The fix is simple: always keep at least 4 hematic grenades in your quick slot before leaving any outpost, and make sure you know how to access them without fumbling through your menu mid-attack.
Another common mistake is ignoring the odradek’s new vibration warning, which is specifically tuned to pick up hidden Ghost Catchers during chiral storms. A lot of new players turn off controller vibration to save battery, but that’s one of the worst settings changes you can make for DS2 gameplay. If you haven’t already, turn vibration up to at least medium, and if you feel an unusual vibration when your odradek isn’t beeping, stop moving and scan the area around you for hidden catchers.
One mistake I made early on was trying to take down a named catcher with only grenades, and I wasted 12 of them before I realized I could use the nearby chiral cannon left by another player to take it down in two shots. A lot of new players get so focused on their own gear that they forget to scan for player-placed tools and supplies that make fights far easier. Take 10 seconds to scan the area around you before you start fighting a catcher, and you might find a tool that saves you a ton of time and resources.
The last common mistake is trying to deliver high-priority fragile cargo through a known catcher zone to save time. It’s never worth the risk, even if the alternative route adds 20 minutes to your run. If you drop or damage fragile cargo, you’ll lose far more progress than you would have taking the longer, safer route. You can always clear the catcher zone first on a separate run if you want to use it for future deliveries.
At the end of the day, catchers in Death Stranding 2 are meant to add tension to your delivery runs, not stop you from progressing entirely. Once you learn their patterns, spot their variants, and stock the right supplies, you’ll barely even break a stride when you see one pop up on your odradek. Don’t stress if you get caught a few times while you’re learning – even veteran players trigger the occasional voidout when they get careless with their cargo weight. Take it slow, pay attention to your surroundings, and you’ll be handling even the toughest named catchers without breaking a sweat.